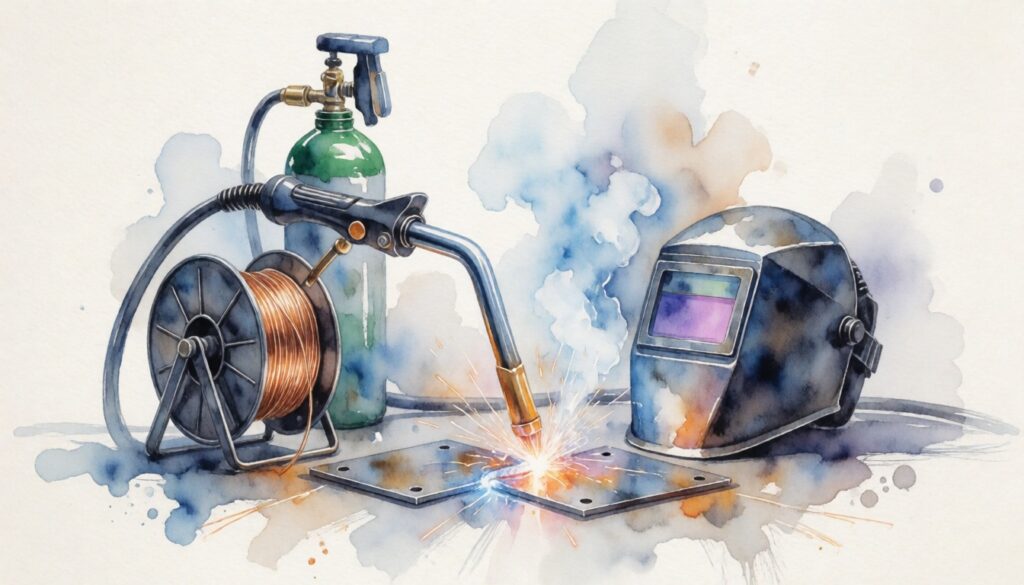
MIG welding is the workhorse of modern metal joining. It is fast, forgiving, and versatile enough to handle everything from a rusted-out rocker panel to a custom trailer frame. Yet for all its popularity, MIG welding is often taught in fragments — a tip here, a setting there, with little explanation of why the process behaves the way it does. This complete guide from COMEKIN pulls the whole picture together. You will learn what MIG welding actually is, how the arc and shielding gas work together, which settings matter, and how to troubleshoot the problems that frustrate beginners and professionals alike.
Whether you are unboxing your first machine or refining technique in a production shop, the goal is the same: a stable arc, a clean bead, and repeatable results. Let’s start at the foundation.
What Is MIG Welding? A Simple Definition
MIG welding stands for Metal Inert Gas welding. In industrial and academic settings, you will also see it called Gas Metal Arc Welding (GMAW). Both names describe the same process, and both point to the two defining features of the method: a continuously fed metal wire and an external shielding gas.
Here is the short version of how it works. A wire electrode spools through a gun, exits a contact tip, and strikes an arc against the workpiece. That arc generates the heat that melts the base metal, and the wire itself melts into the joint as filler metal. Meanwhile, shielding gas flows through the nozzle and blankets the molten pool, pushing away the oxygen, nitrogen, and moisture in the surrounding air that would otherwise contaminate the weld.
Why MIG Is the Most Popular Process for Beginners and Pros
MIG welding sits in a sweet spot that few other processes reach. It is easier to learn than TIG or stick, it deposits metal quickly, and it produces very little spatter when dialed in correctly. It also handles thin materials far better than stick welding, which makes it the default choice for auto body work and light fabrication.
Key advantages include:
- Speed — high deposition rates mean less time per joint
- Short learning curve — you can run a decent bead on your first day
- Low spatter — clean welds with minimal grinding
- Thin material capability — 22-gauge sheet metal is realistic
- Versatility — works on steel, stainless, and aluminum with the right setup
Common MIG Applications
MIG welding shows up everywhere once you start looking for it:
- Auto body repair and restoration
- General fabrication and metal furniture
- Farm equipment and trailer repair
- Home improvement and DIY projects
- Production manufacturing and assembly
A Quick Glossary of MIG Terms
Before going further, get comfortable with these words — they will come up repeatedly:
- Gun — the handheld tool that guides wire and gas to the joint
- Liner — the flexible tube inside the gun cable that the wire travels through
- Contact tip — the copper component that transfers current to the wire
- Work clamp — the ground connection that completes the electrical circuit
- Shielding gas — the protective atmosphere that keeps contamination out of the pool
How MIG Welding Works: Wire, Arc, and Shielding Gas
Understanding the MIG circuit makes troubleshooting dramatically easier. Follow the path of electricity from start to finish.
Step-by-Step: The MIG Welding Circuit
- The power source converts input electricity into a controlled welding current.
- Current travels through the gun cable to the contact tip.
- The contact tip energizes the wire electrode as it passes through.
- The wire contacts the workpiece and creates an arc, completing the circuit.
- Current returns through the work clamp and ground cable back to the machine.
Every component in that loop matters. A worn contact tip, a loose ground clamp, or a kinked liner can all disrupt the arc.
The Wire Electrode: Filler Metal and Arc Carrier
MIG wire does double duty. It is the electrode that sustains the arc, and it is the filler metal that fills the joint. This is why wire diameter and wire feed speed have such an outsized effect on your results. Feed the wire too slowly and the arc stutters. Feed it too fast and you drive excess current into the puddle, creating a cold, crowned bead or burn-through on thin stock.
How Shielding Gas Protects the Weld
Molten steel is chemically hungry. Exposed to air, it absorbs oxygen and nitrogen, forming porosity and brittle compounds. Shielding gas prevents that by creating a localized inert or semi-inert atmosphere around the arc. Get the flow rate right — typically 15 to 25 CFH indoors — and the pool stays clean. Let a draft blow the gas away, and you get pinholes and popping immediately.
Metal Transfer Modes Explained Simply
MIG is not one single behavior; it is several, depending on voltage, current, and wire size.
- Short-circuit transfer — the wire actually touches the pool and pinches off droplets. Great for thin metal at low voltage.
- Globular transfer — large, irregular droplets. Rough and spattery; usually a transition zone rather than a destination.
- Spray transfer — a fine, axial spray of droplets. Smooth, high heat, and great for thicker steel with higher voltage and argon-rich gas.
- Pulsed spray — the machine pulses current to create spray-like transfer at lower average heat. Ideal for thin material and out-of-position work.
Balancing Wire Feed Speed, Voltage, and Arc Length
These three variables are locked together. Voltage sets arc length. Wire feed speed determines how much current the arc draws. If either drifts out of balance, the arc becomes unstable and the bead suffers. A good habit is to change one variable at a time and watch how the bead responds.
What Happens Inside the Weld Pool
Once the arc is stable, three things occur in the pool: penetration into the base metal, fusion between the filler and the parent material, and solidification as the arc moves away. Good MIG welding is really about controlling those three stages — getting enough heat to fuse without so much that the metal warps or burns through.
MIG vs. TIG vs. Stick: Which Process Should You Use?
Each process earns its place. The right choice depends on material thickness, position, environment, and how much time you can spend on cleanup.
Side-by-Side Comparison
| Factor | MIG | TIG | Stick |
|—|—|—|—|
| Learning curve | Easy | Steep | Moderate |
| Speed | Fast | Slow | Moderate |
| Cleanliness | Clean | Cleanest | Messy |
| Thin metal | Excellent | Excellent | Poor |
| Outdoors/windy | Fair | Poor | Excellent |
| Cost of entry | Moderate | High | Low |
When MIG Wins
Choose MIG for thin sheet metal, long continuous beads, production work, and steel that is slightly rusty or dirty. It is also the most practical choice for beginners who want to build real projects quickly.
When TIG Is the Better Choice
TIG offers unmatched precision and control. It excels on aluminum, stainless, and any weld that will be seen — think bicycle frames, roll cages, and decorative work. If appearance and control matter more than speed, TIG is the answer.
When Stick Welding Still Makes Sense
Stick remains the best option outdoors, on thick plate, and in windy conditions where shielding gas would be blown away. It is also ideal for dirty, rusty, or painted steel because the flux handles contamination well.
Flux-Cored Arc Welding as a Gasless Alternative
Flux-cored arc welding (FCAW) uses a tubular wire filled with flux instead of relying on external shielding gas. It behaves like MIG but tolerates wind far better, making it a strong choice for outdoor repairs and field work.
A Decision Checklist
Ask yourself:
- How thick is the metal?
- Is it clean and dry?
- Will the weld be visible?
- Am I indoors or outdoors?
- How much time do I have?
Answers to those five questions will point you to the right process nearly every time.
Essential MIG Welding Equipment and Setup
A MIG setup is a system, and every part of it affects arc quality.
Core Components
- Power source — the welding machine itself
- Wire feeder — pushes wire to the gun at a consistent speed
- MIG gun — delivers wire, current, and gas
- Work clamp — grounds the workpiece
- Gas regulator and flow meter — control shielding gas delivery
Constant Voltage Machines vs. Multi-Process Welders
MIG runs on constant voltage (CV) power. Multi-process machines add stick and TIG capability in one box, which appeals to hobbyists who want flexibility. Beginners do not need every feature — a solid CV MIG machine with good duty cycle ratings will outperform a feature-packed unit with weak output.
In a fabrication shop, MIG welders often sit alongside other metalworking equipment. Consumables like CNC machining tooling and metal mold bases support the same workflow when a project moves from welded assembly into precision machining.
Duty Cycle, Amperage, and Input Power
Duty cycle tells you what percentage of a ten-minute period the machine can run at a given amperage. A 60% duty cycle at 150 amps means six minutes of welding, four minutes of cooling. Ignore this and you will trip thermal protection constantly.
On input power: 110V machines are convenient and portable but limited to roughly 3/16-inch steel. 220V units deliver more output and handle thicker material comfortably.
Wire Diameter, Spool Size, and Drive Roll Tension
Common diameters are 0.023, 0.030, 0.035, and 0.045 inch. Use thin wire for thin metal and thicker wire for heavy plate. Match the drive roll groove to your wire type — V-groove for solid wire, U-groove for flux-cored. Set tension just tight enough to feed reliably without crushing the wire.
Gas Cylinder and Flow Rate Setup
Secure the cylinder, crack the valve briefly to clear debris, attach the regulator, and leak-test with soapy water. Set flow between 15 and 25 CFH for indoor work and increase slightly for outdoor use or high-amperage spray transfer.
Personal Protective Equipment
- Auto-darkening helmet with adjustable shade (10–13 for most MIG work)
- Leather welding gloves
- Flame-resistant jacket or sleeves
- Safety glasses under the helmet
- Respirator for galvanized, painted, or coated metal
Workspace Preparation
Good airflow matters, but not so much that it blows your shielding gas away. Keep flammables well clear, have a fire extinguisher within reach, and route cables so they do not tangle or drag across hot metal.
Choosing the Right Shielding Gas and Filler Wire
Gas and wire selection shape everything from bead appearance to penetration profile.
Carbon Steel: The 75/25 Standard
The industry standard for mild steel MIG is 75% argon / 25% CO2. It offers a good balance of arc stability, penetration, and spatter control. Straight CO2 is cheaper and produces deeper penetration, but it runs hotter and spatters more.
Stainless Steel and Aluminum Blends
Stainless generally calls for a tri-mix of helium, argon, and CO2, or an argon-rich blend with a small CO2 addition. Aluminum requires 100% argon and typically a spool gun to handle the soft wire.
Solid Wire vs. Flux-Cored
Common solid wires include ER70S-6 for mild steel, ER308L for stainless, and ER4043 for aluminum. Flux-cored wire is the choice for outdoor work and windy conditions. Note the polarity difference: solid wire runs DCEP (electrode positive), while gasless flux-cored typically runs DCEN.
Matching Filler to Thickness and Joint Design
Thicker base metal and wider joints need more deposited metal. Step up a wire diameter rather than simply cranking voltage. For tight fit-ups on thin material, stay with a smaller wire for better control.
MIG Welding Settings Explained: Voltage, Wire Speed, and Amperage
Settings are where most beginners struggle, but the logic is straightforward.
What Each Control Does
- Voltage controls arc length and bead shape. Higher voltage flattens and widens the bead.
- Wire feed speed controls current and deposition rate. Faster feed means more amperage.
- Amperage is a result of the other two on a CV machine, not a setting you adjust directly.
Reading the Door Chart
The chart inside the machine door is a starting point, not gospel. Use it to get close, then fine-tune based on what the arc tells you.
Adjusting by Thickness
- 22-gauge sheet — 0.023 wire, low voltage, short-circuit transfer
- 1/8-inch steel — 0.030–0.035 wire, mid-range voltage
- 1/2-inch plate — 0.045 wire, high voltage, spray transfer, multi-pass
Tuning by Sound
A properly dialed-in MIG arc sounds like bacon frying — a steady, even sizzle. Popping means too little voltage or too much wire speed. Hissing and a wide, flat bead mean too much voltage.
Synergic and Auto-Set Functions
Modern inverter MIG welders offer synergic control, where you set material type and thickness and the machine calculates voltage and wire speed. It is a genuine time-saver for beginners and a fast starting point for experienced welders.
Core MIG Welding Techniques: Gun Angle, Travel Speed, and Push vs. Drag
Technique is what separates a functional weld from a clean one.
Gun Angle
Hold the gun at a 10- to 15-degree angle from vertical, tilted in the direction of travel. This keeps the gas nozzle pointed at the leading edge of the pool and produces consistent penetration.
Push vs. Drag
- Push — gun tilted forward, moving away from the weld. Better visibility, wider bead, less penetration. Preferred for thin metal.
- Drag — gun tilted back, moving toward the weld. Deeper penetration, narrower bead. Good for thicker steel.
Travel Speed
Read the bead to judge speed. A ropy, crowned bead means you moved too fast. A wide, flat bead with washed-out edges means too slow. Aim for a bead with a slight crown and even toes.
Stitch, Tack, and Skip Welding
For thin sheet metal, continuous beads cause warping. Use stitch welds, tacks, or skip welding — alternating short beads across the joint — to control heat input.
Practice Drills
Before starting a real project, run beads on scrap:
- Straight stringer beads on flat plate
- Overlapping beads to build a pad
- T-joints in horizontal position
- Butt joints on thin sheet
Building muscle memory here saves hours of rework later.
MIG Welding Positions and Joint Types
Position affects difficulty more than almost any other factor.
The Four Positions
- Flat — easiest; gravity helps the pool
- Horizontal — moderate; watch for sagging
- Vertical — difficult; travel up for penetration, down for thin metal
- Overhead — hardest; keep the pool small and the arc tight
Common Joints
Butt, lap, T-joint, corner, and edge welds each require slightly different angles and heat settings.
Root and Cover Passes
On thicker material, the root pass establishes penetration while cover passes build the joint to size. Clean each pass thoroughly before laying the next.
Bead Patterns
Stringers are straight and strong. Weaves widen the bead. Whips and cursive patterns help control heat on thin metal. For structural work, stringers are usually preferred.
Fillet Weld Sizing
Leg length determines strength. A common rule of thumb is that the leg length should match the thickness of the thinner member being joined.
Metals You Can MIG Weld: Steel, Stainless, and Aluminum
Mild Steel
The easiest material to learn on. Use ER70S-6 wire, 75/25 gas, and DCEP polarity.
Stainless Steel
Requires tri-mix gas, lower heat input, and attention to distortion. Stainless warps more than carbon steel, so clamp and cool carefully.
Aluminum
Demands 100% argon, a spool gun, and a push technique. Aluminum conducts heat away quickly, so higher voltage settings are common.